My new favorite smoothie combo:
Strawberries
Blueberries
Cherries
Peach Nectar
Mix the frozen fruit with fruit juice until it looks smooth enough to drink! Enjoy.
Saturday, October 29, 2011
Wednesday, October 19, 2011
Sunday Night: Crab, Salmon, and Garlic Bread
Sunday night we had one of the best dinners ever! The Seafood Roadshow was at the commissary when we went grocery shopping on Saturday, so as a treat we got 2 lbs of crab legs and 1 lb of salmon (but I had them cut it into 2 pieces - we've eaten 1, the other's still in the freezer). I marinated the salmon in some teriyaki sauce called SoyVay (very tasty!) for about an hour, but I would recommend marinating for much longer than that. It still tasted wonderful, but the salmon could have soaked up some more teriyaki flavor. Jake grilled the salmon while I boiled the crab legs and made some garlic bread. I boiled the crab in my big pot for about 10 minutes, and it was the best crab I've ever eaten! I just threw some salt and pepper in the water, and that was it! We ate it dipped in melted butter. For the garlic bread, I just sliced some demi-baguettes almost all the way through, then used a pastry brush to spread garlic in melted butter on them! I baked them at 325 for 6 minutes with aluminum foil, then 6 minutes without. BEST DINNER EVER! Forgot to take any pictures, but take my word for it.
Saturday Night: Turkey Roast!
I don't usually cook a lot on the weekends. I sort of see it as my time off, too! But, I had a turkey roast from the commissary, and I wanted to try it out in the crockpot, sort of like a pot roast (since I don't eat beef - I can't eat pot roast). Saturday morning I did a little internet exploring, looking for a recipe, and by 1 o'clock I was cooking! Since I didn't find 1 recipe that stuck out totally to me, I blended a couple together. This is what I did:

Peeled (just because it looks nicer) and chopped several carrots
Chopped (roughly) an onion
Chopped several red potatoes
I threw all of those in the crockpot, and stirred them around. Then I added roughly 2 cups of white wine. I added the roast on top of all that, and then added a stick of butter (cut up into pieces). I stuck the lid on, turned that bad boy on high, and let it cook until dinner time (7ish). Here's a picture of what it looked like, pre-cooking:

I totally spaced out and forgot to take a picture of it when it was done, but it was delicious! I'll definitely be doing this again. I also made garlic mashed potatoes and homemade stuffing. For some reason, my garlic potatoes turned out terribly! I think I added too much garlic. But, the stuffing was delicious! Around Thanksgiving I'll add the actual recipe, but since I didn't have it saturday, I just winged it! Anyways, definitely try this, it was so yummy! And, so easy.
Sunday, October 9, 2011
Cinnamon Rolls
This morning/afternoon I made THE MOST DELICIOUS CINNAMON ROLLS! EVER! I wanted to make something yummy and homemade for Jake, since it's a long weekend, and I thought "hey, I haven't made cinnamon rolls in forever!" So, I went onto Pioneer Woman's blog and got her cinnamon roll recipe! Here is a link to the original recipe:
Pioneer Woman's Cinnamon Rolls
Since her recipe was humongous and made 7 or 8 pans of cinnamon rolls (nuts!) I split the recipe in half. Here is the recipe, halved:
The Dough:
2 cups whole milk
1/2 cup vegetable oil
1/2 cup sugar
1 package Active Dry Yeast
4 cups flour, 1/2 cup later
1/2 (heaping) teaspoon baking powder
1/2 (scant) teaspoon baking soda
1/2 (heaping) teaspoon salt
The Filling:
1 cup melted butter
1 cup sugar
Lots of ground cinnamon
The Icing:
1/2 bag powdered sugar
1 teaspoon maple flavoring
1/4 cup whole milk
1/8 cup melted butter
1/8 brewed coffee
pinch of salt
For the dough, you take the milk, oil, and sugar and scald it (get it to just before the boiling point). Then, let it cool down until it is no longer hot, just warm (maybe 20-30 min). Add the yeast, let sit for a minute. Then add the 4 cups of flour. Mix, cover, and let sit and rise for at least an hour! After the dough has risen, add 1/2 cup more flour, along with the baking soda, powder, and salt. Mix, and dump out onto a floured surface. At this point, you're supposed to roll it out into a thin rectangle. (I have no rolling pin, so I used floured hands to smoosh it out. I'm going to invest in a rolling pin for next time).
Assembling the rolls: After the dough has been rolled out into a thin, smooth rectangle (see Pioneer Woman's picture) pour the melted butter all over the surface of the dough. Spread it out, then sprinkle the sugar on top of that! Then, shake the ground cinnamon all over the surface. Take the end furthest from you, and start rolling! In the end, you'll have a very long log of roll. Pinch the ends, and the edge where you last rolled. Spread around a small amount of melted butter in the bottom of your pans (I got disposable 8.5 inch pans from the grocery, and they worked perfectly). Then start cutting your rolls! They should be 3/4 to 1 inch thick. I put 7 rolls per pan, 1 in the center, 6 spread around it like a flower. After that, I let the rolls rise for about 30 minutes. They cook at 375 for 15 minutes, and they're PERFECT.
The icing: Mix all the ingredients together. I didn't use exact measurements for the powdered sugar, I just kept adding until I liked the texture and the color. Pour the icing over the rolls after they come out of the oven, and VOILA! Cinnamon rolls! While they were delicious, I think that next time I'll use a little bit of vanilla instead of maple (or maybe orange? that might be tasty). The maple just isn't my style. Also, I'll use less coffee.
 pre-baking! I did 4 pans
 1 of the pans, out of the oven and frosted
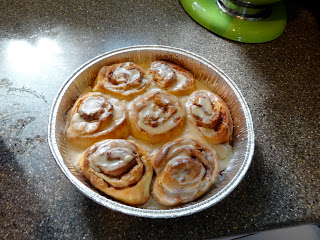
another of the pans, out of the oven
 empty pan! Don't worry, Jake and I did not eat 7 rolls...we had 2 other helpers!
I sent 1 pan home with our friends to put in the freezer and defrost at their leisure, and I saved the other two pans (also in the freezer). One we will probably eat tomorrow morning for breakfast, the other I plan on sending into Jake's classroom this week.
*After making the dough, you can refrigerate it overnight. This makes it much easier to roll out, and makes for prettier rolls. I am impatient, and did not wait. And that's okay.
All in all, 5 stars!!!
Pioneer Woman's Cinnamon Rolls
Since her recipe was humongous and made 7 or 8 pans of cinnamon rolls (nuts!) I split the recipe in half. Here is the recipe, halved:
The Dough:
2 cups whole milk
1/2 cup vegetable oil
1/2 cup sugar
1 package Active Dry Yeast
4 cups flour, 1/2 cup later
1/2 (heaping) teaspoon baking powder
1/2 (scant) teaspoon baking soda
1/2 (heaping) teaspoon salt
The Filling:
1 cup melted butter
1 cup sugar
Lots of ground cinnamon
The Icing:
1/2 bag powdered sugar
1 teaspoon maple flavoring
1/4 cup whole milk
1/8 cup melted butter
1/8 brewed coffee
pinch of salt
For the dough, you take the milk, oil, and sugar and scald it (get it to just before the boiling point). Then, let it cool down until it is no longer hot, just warm (maybe 20-30 min). Add the yeast, let sit for a minute. Then add the 4 cups of flour. Mix, cover, and let sit and rise for at least an hour! After the dough has risen, add 1/2 cup more flour, along with the baking soda, powder, and salt. Mix, and dump out onto a floured surface. At this point, you're supposed to roll it out into a thin rectangle. (I have no rolling pin, so I used floured hands to smoosh it out. I'm going to invest in a rolling pin for next time).
Assembling the rolls: After the dough has been rolled out into a thin, smooth rectangle (see Pioneer Woman's picture) pour the melted butter all over the surface of the dough. Spread it out, then sprinkle the sugar on top of that! Then, shake the ground cinnamon all over the surface. Take the end furthest from you, and start rolling! In the end, you'll have a very long log of roll. Pinch the ends, and the edge where you last rolled. Spread around a small amount of melted butter in the bottom of your pans (I got disposable 8.5 inch pans from the grocery, and they worked perfectly). Then start cutting your rolls! They should be 3/4 to 1 inch thick. I put 7 rolls per pan, 1 in the center, 6 spread around it like a flower. After that, I let the rolls rise for about 30 minutes. They cook at 375 for 15 minutes, and they're PERFECT.
The icing: Mix all the ingredients together. I didn't use exact measurements for the powdered sugar, I just kept adding until I liked the texture and the color. Pour the icing over the rolls after they come out of the oven, and VOILA! Cinnamon rolls! While they were delicious, I think that next time I'll use a little bit of vanilla instead of maple (or maybe orange? that might be tasty). The maple just isn't my style. Also, I'll use less coffee.


another of the pans, out of the oven

I sent 1 pan home with our friends to put in the freezer and defrost at their leisure, and I saved the other two pans (also in the freezer). One we will probably eat tomorrow morning for breakfast, the other I plan on sending into Jake's classroom this week.
*After making the dough, you can refrigerate it overnight. This makes it much easier to roll out, and makes for prettier rolls. I am impatient, and did not wait. And that's okay.
All in all, 5 stars!!!
Thursday, October 6, 2011
Review!
Jake took the cupcakes into his class, and people loved them! So, I guess that I'm just picky? Anyways, several different people told Jake to tell me that I'm "fucking bomb" and that the cupcakes were "fucking bomb." So, I guess that's good!
Wednesday, October 5, 2011
Barbecue and Cupcakes
Today I cooked 2 things. One good, one not so good. I will share the recipe for the good, and just share the pictures from the bad (nobody else needs to try this recipe).
THE GOOD - The pulled Hawaiian Chicken BBQ! So so easy, and so so good. Since I can't eat pulled pork bbq, eating pulled chicken is really a treat, and I'm very excited that I can make it at home! It's incredibly simple. You take your crock pot, add chicken thigh filets (I added 1 package, but I think that 2 or 3 would be better, since the chicken cooks down), layer 1 diced onion on top of that, 1 can of pineapple sans juice, and 1 bottle of your favorite sauce. Let it cook on high for 4-6 hours, and you've got dinner! Plus, it made the house smell really really yummy all day!
 right after I put all of the ingredients in
 after about 2 hours
 4 hours
 5 hours
 right before I took the meat out
 the meat, out and shredded. tasty! we ate it on buns.
THE BAD - a white birthday cake recipe from The Clinton St. Baking Company cookbook. The cake tasted flour-y and the icing had a very strange texture. All in all, it didn't taste bad, but it didn't taste delicious either. The good news is I got to use my new (used) mixer! Maiden voyage - success! Here's a picture of the beauty:

Back to the cupcakes. Since we have a space-saver oven (a microwave that converts to an oven) conventional muffin pans don't work. Luckily, I found these nifty cupcake cups at the local grocery! They can freestand while you bake, no pan needed! And, they're super cute.

Here are all of the cupcakes pre-baking:


The circular pan went into the microwave (so it could rotate, baking evenly), the square pan into our nifty toaster oven. And here they are out of the oven!

Not too bad! Considering the state of our "ovens" I was impressed. Too bad the taste was off :(. And, here they are all iced and pretty, ready to go into school with Jake tomorrow. I hope that all the soldiers are hungry enough to like them!

I did orange icing to go with the Halloween theme. I used my new piping bag to ice them, and it worked out well!
THE GOOD - The pulled Hawaiian Chicken BBQ! So so easy, and so so good. Since I can't eat pulled pork bbq, eating pulled chicken is really a treat, and I'm very excited that I can make it at home! It's incredibly simple. You take your crock pot, add chicken thigh filets (I added 1 package, but I think that 2 or 3 would be better, since the chicken cooks down), layer 1 diced onion on top of that, 1 can of pineapple sans juice, and 1 bottle of your favorite sauce. Let it cook on high for 4-6 hours, and you've got dinner! Plus, it made the house smell really really yummy all day!


THE BAD - a white birthday cake recipe from The Clinton St. Baking Company cookbook. The cake tasted flour-y and the icing had a very strange texture. All in all, it didn't taste bad, but it didn't taste delicious either. The good news is I got to use my new (used) mixer! Maiden voyage - success! Here's a picture of the beauty:

Back to the cupcakes. Since we have a space-saver oven (a microwave that converts to an oven) conventional muffin pans don't work. Luckily, I found these nifty cupcake cups at the local grocery! They can freestand while you bake, no pan needed! And, they're super cute.

Here are all of the cupcakes pre-baking:


The circular pan went into the microwave (so it could rotate, baking evenly), the square pan into our nifty toaster oven. And here they are out of the oven!

Not too bad! Considering the state of our "ovens" I was impressed. Too bad the taste was off :(. And, here they are all iced and pretty, ready to go into school with Jake tomorrow. I hope that all the soldiers are hungry enough to like them!

I did orange icing to go with the Halloween theme. I used my new piping bag to ice them, and it worked out well!
Subscribe to:
Posts (Atom)